Friday, June 29, 2012

On Vanity

Those of us in the vintage community are used to being over dressed. In general, I enjoy being the best dressed person at an event but sometimes I just feel, well, vain. Perhaps it is my chosen profession. Chemists are among the people expected to have the least amount of fashion sense.


See, it's all lab coats and safety goggles. It's not that chemists can't look nice. I know some who do, but with wardrobe limitations due to safety and the natural hazard to anything you might wear due acids and other gnarly chemicals, it doesn't exactly encourage a trendy wardrobe.


I often fear that I will be perceived as less serious when I dress in such an overtly fashionable way. And it is true that the bulk of my wardrobe is completely inappropriate for work. *sigh*

Yet there is another arena of my life where fashion is utterly inappropriate. I go to a very active and involved church, which is not a problem in itself, but we meet in a riding arena. Dust, dirt, cats, horses, no ac, no central heating and an entire pit of sand to walk in. Don't get me wrong. It's a nice riding arena and there have been loads of improvement since we first moved our church there, but most people dress appropriately for the conditions.


And then there's me who can't remember the last time she wore a pair of sneakers. And I wouldn't wear them to the arena anyways because they are suede.

But all of these are really just reflections of the attitude prevalent in modern society. People marvel at me when I wear hats but for hundreds of years, no woman would dare leave the house with her head uncovered. Even in the 50s hats were a regular part of a woman's wardrobe. Oh, for the days when showing your ankle was scandalous! Now I can barely walk out the door without seeing some shirtless, overweight middle aged shirtless man and the undergarments of 9/10 of the young women I see.

Compared to the low standards of modern society, I don't see myself as vain at all just putting in a bit of effort, but that doesn't keep me from feeling that way.


I like nice things. I have pretty and impractical shoes. My one pair of rtw shorts come from White House Black Market. I adore giant poofy skirts. I pin curl my hair. I wear red lipstick and winged eyeliner.

And tonight, I will be going to my church's 4th of July fireworks event. It will likely break 100 F and it will be crazy humid. I will be wearing a dress and a crinoline and red lipstick. But I will be practical and leave my hat at home.

And mostly, I'm ok with that. What the average person doesn't realize is that it doesn't really take that much effort to look great. A cute dress is easier to slip on than jeans and a t-shirt. I spend less time on my hair than most teenage girls. And red lipstick is not hard to wear. It just takes courage.

So here is my message to all of you whether you are already a fashionista or if there is a stylish woman inside of you who has been too scared to break out of her shell. This is the message that I have to tell myself sometimes when I look in the mirror.

It's ok to be fabulous. It's ok to be different. It's ok to be beautiful.


This is how I feel fabulous and different and beautiful. Sometimes, other people may make you feel bad for being fabulous and different and beautiful but you can't let them keep you down.

And now I have to go do my hair and put my lippy on.

Thursday, June 28, 2012

Tutorial: DYI Parakeet Activity Center

Ever since my parakeets started playing with my fabric scraps, I've wanted to make them a fabric activity center. It's a bit outside of what I usually blog about, but I'm pretty excited about it.

Supplies:

About 1/2 yd of fabric
Thread
Assorted fabric/yarn/beads etc.


 Start with your fabric and cut a nice long rectangle.


Press!


Attach your scrap toys. I have some strips of fabric with pinked edges, a flap with a button hole, some hemp...Be creative!


Pin any floppy bits out of the way so they won't get accidentally sewn into the seam.


Fold the fabric right sides together and sew along the edge using 1/2" seam allowance. Leave a couple inches open for turning.


Pink seam allowances and clip corners.


Turn, press and slip stitch opening closed.


Don't forget to remove any pins before you let your birds on it!


Now set out your play area where your keets can get to it.


I like to encourage my birds to investigate something new by putting some millet on it.

Youtube of the Week: Lost in the 50s

This style is inspired by the lovely Laurence of Lost in the 50's. She is so darling!

Wednesday, June 27, 2012

Advice Needed

Well, I've gotten my costume to the point where it's almost wearable. I'm just not sure I like the look of the lacing rings on the outside.


I think they look a bit garish on the outside especially since the lacking cord goes almost straight up and down.


My husband had the genius idea that I try it on inside out to see how I liked it. Much cleaner but there is still gaping under the bust. That's where all of the support comes from. I'm not sure if more lacing rings in that area or a different way of lacing or maybe just placing the lacing rings further away from the edge would help. 


I already have a caul to cover my hair but since I'm still a week and a half out from the event for this costume, I'll have time for some accessories. I could do a partlet which is this bit with the collar.

Or removable sleeves or a petticoat or an apron. Hmmm... decisions, decisions.


So do you like the rings outside?


Or inside? I think they'd need a bit more tacking down on the inside to help the fabric lay properly.

Tuesday, June 26, 2012

The Red Suitcase


Remember how I was drooling over this suitcase Amy Adams has in The Muppets?


Well, my husband very sneakily bought this one for me on etsy. Eeeep! It came from a darling little vintage etsy shop called Grand Manner.


I fell in love with this one! It was in great condition and look at the lining!


It's got roses woven into the fabric. And look, there's a little bag for holding small things and ties to hold your clothes down.


I couldn't resist tucking a few of my vintage dresses in there to see how the looked.


Cuteness!

Monday, June 25, 2012

Bodice Construction: Part 2

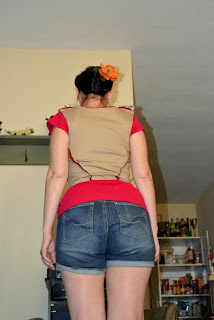
Here are some pictures of my corded bodice on me so you can see how it fits.


It looks a bit wonky but this was super hard to pin together. The birds were helping. ;)


Lots of boning channels!


Some back wrinkles but I think my shorts were making it ride up. Plus the skirt will help hold everything down.


Look at that bust support! I'm not wearing a bra here, this is just the hemp and cut of the bodice doing all the work.


The skirt is 3 yds of linen that is pleated to be the width of bodice waist line. I used a combination of box and double box pleats. The front(ish) is single box pleated and the back(ish) is double back plated. I did measure out the front box pleats but just kind of eye balled the back ones and fiddled with them until the waistline was the correct length.


I'm super excited because the inside looks so pretty!


Boning channels on the inside.


I sewed on brass plated rings meant for drapes and curtains to use as lacing rings. I'm going to try and do a more period spiral lacing. I had planned on using some black wool from my stash to make trim but then I found three packs of black bias binding and decided that that would be much easier.


And here's the back.


Bird!


Another bird!

Sources:
corded boning: http://www.festiveattyre.com/research/cording/cord.html
pleating: http://www.elizabethancostume.net/pleats/
pleating layout: http://www.festiveattyre.com/research/diary/diary4.html
spiral lacing: http://www.festiveattyre.com/research/lacing/lacing.html
pattern drafted following (mostly) these directions:
           bodice: http://www.elizabethancostume.net/kirtlepat/
           skirt: http://www.elizabethancostume.net/makekirtle.html
Trim inspiration: http://www.festiveattyre.com/gallery/campi/wkclass.html

Wednesday, June 20, 2012

Bodice construction: Part 1


 So, after perusing the rather limited color selection of linen blends and (even smaller selection!) linen, I ended up purchasing this lovely red linen/rayon blend for my dress. I think it's 62/38 or 64/36 being more linen but I looked at so many I can't remember which. I also purchased a bit of navy for sleeves and natural for an corded petticoat. The linen was on sale 50% and I had a 30% off coupon to use on top of that so I decided to be ambitious.


 These pieces are actually the "lining" so to speak so that the cords don't sow through the front (I hope). It's interlined with cotton twill. I made 1/4" channels and used a doubled length of hemp cord for the boning. Not sure how that curvy one in the front is going to work out but I guess if all else fails, I can always pull the thing apart and remove it. I used a piece of jewelry wire that I bent to have a very thin hook on the end to thread the hemp. Wish I'd had thinner wire! It took up a bit much space in the channel and made the insertion process hard. My poor hands were killing me last night!


 I also cut out and interlined the back piece which will not have any cording. This is going to be a very interesting experiment and I hope it works! The twill alone did a pretty good job of supporting the girls but once I decide how to line this project (an therefore which seams to sew next!) I can try it on and see how things are coming along.


 Working on a major sewing projects with the birds around has been interesting.


 Not only do I have to make sure they are safe from things like pins and hot irons, but I have to make sure my work stays away from fresh bird turds.


 They adore playing with fabric and have adopted some of my scraps which is good because between the birds and the fabric cutting I've been doing lately, I desperately need to vacuum (which is what I ought to be doing instead of blogging....). Seriously, fabric and seeds everywhere! I just have to keep these gals away from my good pieces. But since I did just clean up my sewing space of all non-Renaissance related materials, it can all fit on my table.

Sources for the use of cord boning:
http://www.festiveattyre.com/research/cording/cord.html

Youtube: Heddy Lamarr with Bangs

This video is a response to A Vintage Vanity's Heddy Lamarr tutorial. So go watch her's first to get all the gory details. Mine focuses mostly on getting those pesky bangs to look not like bangs. Enjoy!

Monday, June 18, 2012

More Renaissance Planning

On Friday, I posted a pretty extensive list of things that I needed to fix on my Renaissance dress before September for the Ohio Renaissance Festival. Then I posted this picture after a much needed trip to Jo-Anns. So here's what happened between the first and second post.

My husband and I recently decided to go to a different Renaissance Festival in Kentucky. The only issues is that a) there's no way my red dress could be done in time and b) in July it's much too hot to wear it anyways. I thought that I could wear my very first "Renaissance" dress, but my husband vetoed that idea. He thought I could do better. So when I went shopping, I found an appropriate pattern on sale plus some yummy home dec fabric for $4.50 /yd. Bingo!

Alas, after some more research Friday evening (and realizing that a dress made from the fabric I bought would still be gobs too hot in July), I've decided to opt for something more like this:


From what I've found, this type of costume is more of an Italian style. The Ohio RenFest is set in Elizabethan England and the KY one appears to be Scottish, but really the average person is not going to know/care if I'm a couple of countries off.


I love all of the different trim patterns. Simple but lovely.


I'm currently planning a front laced dress made of linen and a bodice interlined with twill.


I'm also planning a white shift.


I may also make a partlet (that's the bit with the collar), detachable sleeves and corded petticoat if I get around to it.

I've been using this site for research/pattern drafting. So far I've been working on the bodice muslin. I won't be wearing a corset or boning this bodice but I'm hoping the twill and cut of the bodice will give me enough support to forgo wearing a modern bra. I wore my 3rd muslin (made of the same twill I'll be interlining it in) around a bit last night and it does have rather astounding gravity defying properties. We'll see how the final outfit turns out.

Today's goal is to bang out the shift and get some fabric on the cheap. My budget is $50 or less for this garment.