Showing posts with label costuming. Show all posts

Monday, February 1, 2016

Brevard County Renaissance Festival

I was so excited when I learned that a new Renaissance Festival was starting in Brevard County! I really miss the Ohio Renaissance Festival and getting to do Renaissance costuming!! So the hubby and headed out for opening day this weekend.


I decided to wear my grey wool gown since we've been having a bit of a cool spell. It was great in the morning but the day heated up more than I expected and I ended up being warm for most of the day. Seriously, the only time I get excited about cold weather is for costuming.


Will opted to wear his monk costume for the event. He's lost quite a bit if weight this past year and both of his kilts are too big. I haven't quite figured out how to take them in with all of the loops and buckles and such.


I wasn't sure what period of the Renaissance the faire was going to aim for since their website mentioned William the Conqueror, Queen Elizabeth I, the Canterbury Tales and a Knight's Tale all on the same page. Turns out it was definitely on the earlier end of things with Richard the Lionheart and Prince John and all that. (I'm thinking 12th century.)


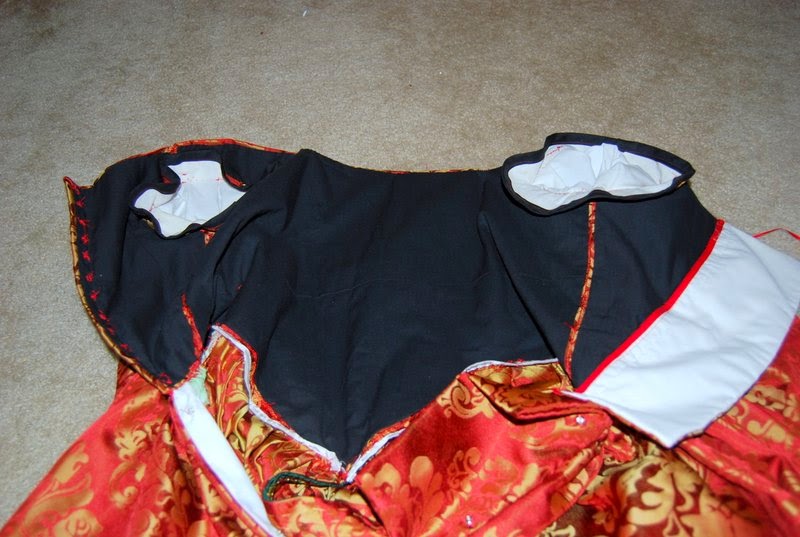
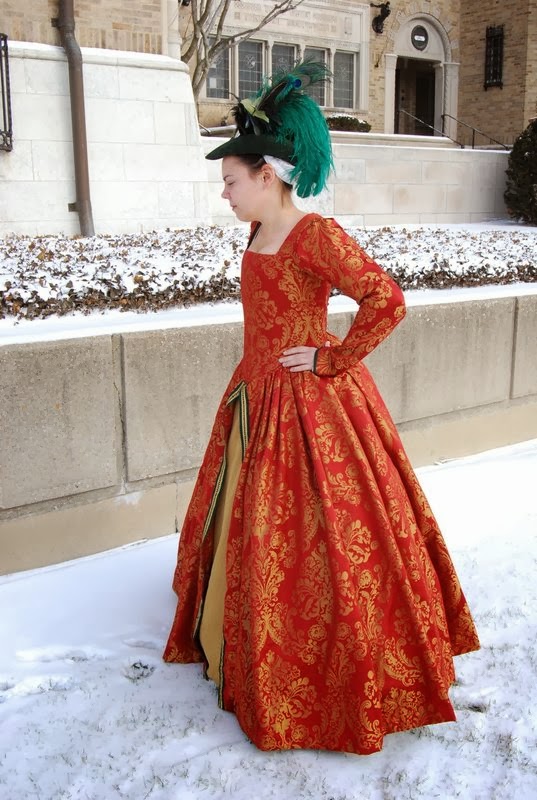
Anyways, I decided to go for poshly middle class Elizabethan but with no sleeves. (I knew it wasn't going to be that cold!). I added in my bum roll and my nicest shirt and apron. Too bad I never finished my blackwork caul! That would have been fabulous.


Loads of people too photos of us and we did get mistaken for staff but I take that as a compliment! They did a super awesome job for this being the first time running the fair in their first year. It takes a lot of time to build up a fair to the quality of what we're used to from Ohio.


The weather the day we went was fabulous but it had been raining a lot the few days prior so it was quite muddy!!! I decided to go ahead and wear my American Duchess Stratfords. I was very impressed with how well they handled the muddy conditions. I had issues in Ohio with all of the gravel at the fair eating up the soles but they handled the mud beautifully. They needed a bit of tlc when I got home but now they are back looking good as new.


There were a lot of cool shows including the Flight of the Raptor who flew falcons and hawks for us. It was so amazing to see these beautiful birds in flight. We heard several awesome Scottish and Irish bands with bagpipes and drums. There was no SCA presence but another Renaissance/Medieval group called the Adrian Empire was there and we got to see some skilled artisans and combatants. I love meeting more nerd people.


 We had a lot of fun and can't wait to see what they roll out in 2017. (They are open this weekend as well but it looks like we probably won't be making it out again.) Plus I have a whole year to work on an older period costume so I won't be to "modern"! I love playing with new periods.

Huzzah for the Brevard County Renaissance Festival!

Saturday, October 11, 2014

The Borgia Dress Project

A while back, I posted about my dream to sew a dress based off of the costumes in the show The Borgias and it's going to happen! I spent a lot of time researching and looking for fabrics and such and I found some stuff out.

The first thing I needed to know was how period accurate were the costumes. They were gorgeous but costumes on film (especially on tv shows) have a tendency to be rather unperiod. And these are no exception.


Actually 1490s garments- note the curved bust, center front lacing and over gowns they are all wearing.


 The Borgias dress- straight front, side or back lacing, and no over gown. But they do get points for period appropriate prints, chemises and period appropriate hair.

So even though they are not 100% period, they are gorgeous and they aren't that far off from what would have actually been worn (especially when compared to some other "period" tv shows that have come out lately). And I love them so I'm going to make one. Plus I'm feeling in the mood for a pretty pretty dress.

Despite being set in France, the costumes in the movie Ever After are also based off of this period also and it's one of my favorite movies. So double score.


Originally, I was really inspired by this dress that Vanozza, the mom, wore. I really loved her outfits because they were higher cut and lower waisted than most of Lucrezia's more fashionable dresses. Being a chesty gal, I needed some space so I wouldn't be popping out everywhere.


But I ended up deciding on this dress, but in purple since I'd already fallen in love with some pretty purple fabric researching the other dress. And it will be silk because I want to sew the pretty things!


On the left, purple silk doupioni and on the right, black and gold silk damask. Most of the gown will be the doupioni and the contrast trim will be the damask. I also snagged a gorgeous dark purple silk blend velvet for the bodice.

Of course, the first step in a new period is period appropriate under garments so it'll be a while before I can start working with the silk. (So I'll just pet it for now....) The corset is mostly done and the chemise is up next on my list. Thankfully, I can do a pretty period accurate shift for this dress so I can use it for other more historically accurate dresses.

Monday, September 29, 2014

A whole new level of nerd

This weekend, I attended my very first SCA event. The SCA, or Society for Creative Anachronism, is an organization that researches and recreates skills and arts of pre-17th century Europe. So, basically it's a bunch of nerds getting together to do nerd things but instead of nerding over the latest technology, they nerd about things like blacksmithing, archery or cosmetics from days long past.

So, I was a bad blogger and didn't get a single picture of me (or anything else for that matter) but I was wearing my red peasant dress as seen here except with a different shift and partlet. I really wanted to have my Italian dress done to wear but that didn't happen. Hopefully, I'll be able to share some progress on that later this week.

So instead of pretty photos of me and other people from the event. I thought I'd share my experience and maybe give some tips for going to your first SCA event. Also, lots of pictures from the Borgias tv show because right now I want to make one of those dresses!! In silk!! Sew all the pretty things!!!

Ok, moving on.


Tip #1: Bring a Friend

This is the type of thing that can be super intimidating to go to on your own especially if you are shy like me. If you go in a group, at least there will be two of you running around having no idea what's going on.

Even more helpful than bringing a friend is bringing a friend who's in the SCA. The SCA is kind of like the military where they have all of these code words and acronyms that you will have no idea what is going on when people are talking. Even having been to several of the meetings and reading some SCA blogs online, the jargon was a bit overwhelming. Will wasn't able to come with me but luckily, I ran into some of the people we met at the Kentucky Renaissance Festival and they showed me around, introduced me to people and explained things to me.


Tip #2: Go to some meetings before hand

Local SCA groups usually meet at least once a month. Going to at least one meeting before hand will allow you to meet some people and get used to some of the lingo before you go to the event. You can look up your local group on the SCA website. It was nice to see some familiar faces at the event. These people can be your "bring a friend" as long as they are not heavily involved in running the event (because then they will be busy).


Tip #3: Dress comfortably

For your first event, wear a comfortable costume that you can go all day in. Nothing is worse than major pain at an event due to uncomfortable costumes!!

If you don't have a costume to wear, there are loner costumes available. Go to the "troll" (where you check in and pay) and ask for the "gold key" (loner garb). Again with the jargon!!! While I did have a costume, I only learned about this magical stash of loner costumes by attending the meetings.


Tip #4: Try something new

The SCA encompasses a wide range of topics with many winding rabbit holes. In much of the historical costuming community, 1500s is quite old but in the SCA, it's on the new end of the time scale. This is a great opportunity to take a class on something you've never even heard of before. I happened into a class on paternosters, which are prayer beads, and it was very interesting.


Tip #5: Bring some snacks

Both at this event and the previous event that my local group hosted (but I didn't get to attend), the dinner feast got sold out. I'm sure this doesn't happen at every event, but bringing extra snacks will save you from having to leave and go to the drive through in your costume!

Over all, I had a lot of fun at the event. I really enjoyed the classes. It felt very much like Costume College. Plus I adore learning new things! I did get to watch a bit of fighting but that's not really my thing. (I hates all sports.) I'm not 100% sure that the SCA and I are a perfect fit. Really, I just want to costume, but I'm definitely going to go to more events and see how I like it.

Monday, January 20, 2014

HSF 1: Make Do and Mend

Originally, I wanted to do something 40s for this challenge but I decided to focus my energy (and free time over Christmas break) on making do with a bigger project.


Oh, my Elizabethan court dress..... It started out as a Tudor dress (right) back in 2011 when I'd only been sewing for about a year. The construction was fine (although it took forever) but the fit was not so great especially since my corset was too big. The right is the Elizabthan-ified version of 2012 after I'd lost 30lbs, made interchangeable sleeves and got a new corset. But it still really didn't fit well. I only wore it once last year to a ball and I knew that it needed some serious work before it could be worn again.

I decided to completely scrap the bodice and use my gray wool kirtle as the supportive undergarment rather than the second corset.


Tada! New bodice!


The Challenge: #1 Make Do and Mend

 I had to piece a lot of the lining but waste not!

Fabric: Leftover fabric from making the dress the first time, cotton scraps from another project for lining and leftover cotton twill for interlining


Pattern: I drafted it from a combination of the original bodice pattern (Simplicity 2589) and my gray kirtle pattern.


Year:  Tudor/Elizabethan (ie second half of the 16th century) depending on what sleeves and headgear I use

Notions: red thread from stash, plus I reused the bones from the original bodice


How historically accurate is it? Well, the outer fabric is polyester and the lining and support layer are cotton so not so good on the fabric. Red and gold were popular colors during the period so that's good. The shape is much better with the new underpinnings and newly drafted bodice.

Love the new shape on this dress! 
There's still a bit of curve near the bust, but that's perfectly period.

I also did much more period construction on the new bodice. I made it the same way I made the kirtle bodice. The biggest thing I wanted to improve (after the fit) was to do hand eyelets instead of using huge ugly grommets. So much nicer looking now!

 I did dig out the old modesty panel from the original bodice and added it in after the photo shoot. And I'm going to have my husband practice his lacing skills before faire season. It does, in fact, lace all the way closed except for right above the waist seam.

 No more gaposis!

My original idea for interchangeable sleeves were to attach lacing rings to the armscye and the sleeve head and tie them together. It was a major fail! They were super fiddly and the sleeve facing kept poking out. This go around I decided to lightly whip the sleeves in. It's a bit more work when it's time to interchange them but they function much better when in.

You can see the whip stitches but I'll follow the old costumer's adage-If they're looking that close, kick them!

The original skirt I kept the same except adjusted the pleats to fit the smaller bodice waist. It was partially hand sewn and partial machine sewn to the original bodice and I hand sewed the entire thing to the new bodice. The rest of it is the original machine stitching from when I first made the gown.


Hours to complete: I lost count. It was a lot of hand stitching but it went a lot speedier than my first go at a mostly hand stitched piece.


First worn: January 2014 just for pictures

Total cost: $0 everything was leftovers from other projects.


 I'm so happy that this dress is wearable again but it still needs some major trimming! I don't have enough of the trim from the old bodice to trim the new bodice so I'm going to have to start from scratch. Shucks! I have to buy yards and yards of trim.


 Not to mention, I was never very happy with the particular shade of gold I used when trimming this gown. It reads a bit tacky halloween costume.


Speaking of trim, as part of the make do challenge, I also removed all of the scratchy gold trim off one of my shifts. You couldn't see it anyways.


 I'm thinking something gold that more matches the gold in the dress fabric plus pearls! I loved beading my 19-teens does Elizabethan fancy dress.


You may have noticed an Eizabethan explosion on my pinterest this week. I may or may not have spend most of my free time this week "researching".


 Yay for having the hard part of this dress done and just the fun part left!

Tuesday, July 23, 2013

HSF #15: White

This is my last Historical Sew Fortnightly project before Costume College! The challenge is White. "White has carried many connotations as a colour, from defining culture and social boundaries, to denoting status, to implying purity, or simply cleanliness.  For this challenge ‘white’ is defined as anything in the white family – from brightest white, through to ivory and cream and all the shades between. Whether you make a simple chemise or an elaborate ballgown, your item should be predominantly white, though it may have touches of other colours."


Tada! This is my 1914-1915 day dress. If you missed the inspiration post, check it out here.

Stephanie_Woodlawn Pond-0057

The Challenge: White
Fabric: 4 yds embroidered cotton ($7/yd), 2 yds white broadcloth ($3.50/yd), 2.5 yds yellow broadcloth ($3.50/yd)

Stephanie_Woodlawn Pond-0054

Pattern: Past Patterns #8480
Year: 1914-1915

Stephanie_Woodlawn Pond-0040-2

Notions: snaps and hooks and eyes ($3)
How historically accurate is it? Pretty, I think. I used a period pattern and it's all cotton! I used loads of french seams but did end up zig zaging some of them. Not sure if the construction is 100% period but the directions weren't exactly much to go on.

Stephanie_Woodlawn Pond-0028

Hours to complete: Started in January but didn't get finished till July! Lots of time spent figuring out how to put the pieces together.
First worn: July '13
Total cost: ~$40

Stephanie_Woodlawn Pond-0038

I got a hair piece and this was my first time playing around with it. I'm a bit urked as I ordered the dark brown color but it's chock full of coppery highlights! Thus most of it is not actually brown at all... Oh, well. I used American Duchess' 1912 hair tutorial

Stephanie_Woodlawn Pond-0044

 Love this dress and can't wait to wear it to Costume College! :D And if you'd like to see more photos, there's a ton more over on my Flickr.

(Update: Also check out my construction details post)

Friday, May 31, 2013

Those Crazy Edwardian Waistbands

Ok, so I know yesterday I said that I might not do any construction posts, but I did finished the skirt of my gala dress and got off my lazy butt and took some construction pictures. Construction during the 19-teens is very odd and complicated compared to any other period I've done. They had a thing for have each layer closing at a different place and never have one set of closures the same for the top and bottom of the garment. There's not a ton of people who do costuming between 1913 and 1920 so I thought that it would be good to contribute some photos for future sewists trying to figure out this crazy period.


In case you missed yesterday's post, this is the pattern I'm using for the skirt. It's an dinner dress from 1918. (Think dinner dress from Downton Abbey.) I'm doing the pink and yellow/orange style skirt with the side poofs/bustles/thingies.


Skirt! It does drape better when hanging up rather than laying on the floor but I've got a whole bunch of other stuff hanging up in my currently being worked on UFO spot so it was easier to just move this one piece. Instead of interlining the sheer layer with the white layer, I just made them separate layers and joined them at the waist band.

And now for the crazy closures:


The red "tunic" layer has seams in the center front and center back with the closure in the center back. It closes with snaps and a hook and eye. I used red bias binding for the snap placket since I was not going to try and make one out of this crazy poofy fabric (though it would have matched much better if I had!)


Now, the skirt portion has seams at the sides but not at the center front or back. So 1/4 of the tunic layer is on it's own separate waist band piece that connects to the main waist band with snaps. I just made the waist band from two layers of ribbon and it's pieced quite a bit as I was trying to figure out how to make all of the flaps and layers work. But that's ok since it's not going to be seen at all anyways.


The skirt portion then closes with snaps and a hook and eye just like the tunic layer. I did not add any closures to the sheer layer since it'll be covered by the tunic anyways. It just has a narrow hem.


And to add another layer of complexity to the garment, the bustle poofs are attached at the side seams which interferes with the side closure of the skirt part. So instead of being sewn down to the skirt, the gathers are tied off at each end and then snaps are used to hold the gathered sections in place. I just used one at each end and that was enough to hold it to my liking. In the picture on the pattern cover, it looks like there is some kind of decoration over the gathered part but I think I'm going to skip that because my dress is looking quite busy already.

Now, normally this wouldn't be on a separate waist band but would rather be connected directly to the blouse portion of the dress. I decided just to skip on that for several reasons such as I'm using a completely different blouse pattern and I really just didn't feel like bothering with it. The design of the blouse part *should* cover the waist band with no problem, but we'll see.

I was pleasantly surprised by the amount and quality of the directions that came with this pattern. I don't know if the Vintage Pattern Lending Library added directions or by this point in time pattern makers had started adding more directions to their patterns but there was a lot less banging of head against the wall trying to figure out how to get this to work. Some puzzling out was still necessary (especially since I wasn't doing the blouse part) but it went together quite smoothly.