Friday, October 31, 2014

Fall Fun

Fall has been pretty much amazing this year! Which is great because this will be my last midwestern fall. Usually we only get a handful of nice days and we're already in sad dead winter already but fall lingered longer this year!


So I grabbed one of my favorite dresses to play around in the leaves! This all started with last weekend's wedding when we shot some great shots in the most amazing pile of orange leaves.


 We were on a time crunch so I didn't have time to sneak outfit pictures in the leaves but I soooo wanted to run and play in them! It didn't help that the weather was perfect.


So I just had to find some leaves to play in! Not having a yard, I don't have to rake up leaves but I don't have piles of leaves to play in either.


Thankfully, we found an obliging tree behind the condos next door. It wasn't quite a pile but they were deliciously crunchy!


Yay leaves!!!


You might notice something else new-glasses! A while back, I won a free pair of glasses in a giveaway and I choose these red frames. When they arrived, I wasn't quite sure they were me so I didn't wear them a lot.


But I decided new things are good and I wore them out. And they are pretty much awesome! I still love my old glasses for vintage looks better but options are always great.


 Have you tried anything new for fall?

Wednesday, October 29, 2014

Just Another Pixie Grow Out: Month 5

My hair is growing! Seriously, it's getting long!


Monday, October 27, 2014

Click!

I'm so excited because not only do I have an outfit post for you but it also includes my latest sewing project-which I love! I'm so excited to get back to sewing! It's been a crazy costuming season and it's nice to have a quick easy project.


Tada! It's a camera skirt! I excitedly purchased this fabric earlier this year but then had cutting anxiety. I couldn't decide what I wanted to make from it! It's a novelty quilting cotton in a directional print so I needed a specific type of project to make it work.


 I was also looking back at my old pixie photos from the beginning of summer trying to decide if I wanted to chop off my hair again already. (Answer: not yet!) And I saw my playsuit from the sew along and I knew that that's what this print wanted to be.


So there will be a matching blouse at some point in time. You know, once I decide on buttons and make bias facing, but the dirndl skirt was ready to go in time for the wedding last Saturday. I opted for a side zipper instead of a button placket because I felt the print was way too busy for that many buttons.


The colors in the skirt include some of my favorites-orange, chartreuse and mint! I went with orange and teal (close enough to mint right?) to pull the outfit together. And it was great to get to pull out my orange lippy again! Seriously, orange has become one of my favorite colors to wear.


I went for classy and quiet for accessories since I was already supporting loud colors and a loud print. I got oodles of compliments on my outfit the whole day! It made me so happy that I finally got to make something from this great print.


There's nothing quite like a new outfit to make a girl feel amazing!

Saturday, October 25, 2014

A Very Curly Vintage Style Tutorial

Today we're using sponge rollers to get a very curly vintage style! Small sponge rollers are great for when you want loads of curls!


Wednesday, October 22, 2014

Striped Italian Dress: The Details

Today we're getting into the nitty gritty details of my striped Italian dress. Missed the reveal? Start here.

Fabric: 4.5 yds striped polyester ($4/yd), left over black linen and printed cotton for lining (stash), 5 yds muslin for lining ($2/yd)
Pattern: The bodice is self drafted and the skirt is based off of Henrician lady's petticoat in the Tudor Tailor
Year: 1590s
Notions: ~20 yds green velvet ribbon ($10), ribbon for lacing ($3), zip ties ($5)
How historically accurate is it? Definitely not in the fabric department but I'm very happy with the overall look
First worn: Ohio Renaissance Festival October 2014
Total cost: $46


I moved the lacing to the side back on my bodice pattern which was pretty easy since I had a seam there already. I also made the back neckline square. Each piece is made in the normal way-a piece of canvas covered in fashion fabric and then lined in cotton or linen. There are zip ties stabilizing the edges of the opening and also three in the front to help keep the bodice lying nice and flat.


The skirt is lined in muslin. The skirt seams didn't line up with where I needed an opening so I made a facing and made my own slits where I needed them.


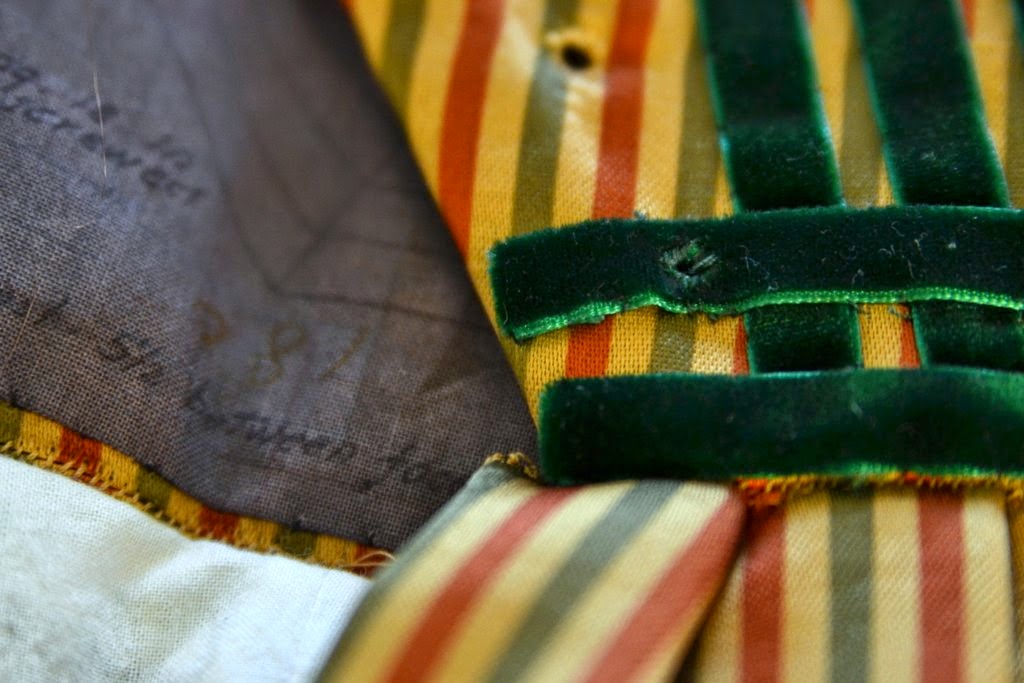
I really wanted 1/2" velvet ribbon but apparently no one makes 1/2" velvet ribbon. Originally, I had 5/8" black velvet ribbon but it was too wide and looked too harsh. So I picked up 3/8" green velvet ribbon instead and it looked much better! I stayed pretty true to the portrait trim layout except I left off the little loopy bows at the waist.


I pretty much mirrored the front trim placement on the back since the portrait only showed the front of the dress.


The back caused me some serious trim placement issues. The original bodice back was way too narrow at the back for this trim arrangement, but since the whole thing came out too small and had to be remade anyways, that helped out a lot! On the front, I managed to get my eyelets to come out between the trim but on the back I had to make a hole in the ribbon so I could get to the bottom eyelet.


I ended up not using any hem stiffening since my kirtle had a stiffened hem. But I did add three rows of trim to the bottom. The portrait didn't show the bottom of the dress but it makes sense to me that a dress with that much trim on the bodice would have some on the skirt as well. These rows of ribbon actually helped stiffen the hem a bit so I got a very nice silhouette on the skirt. 


For the sleeves, I started with my self drafted sleeve but made it a bit narrower for a more fitted look. It is also lined in muslin. I searched high and low for a tutorial on the sleeve puff and found just this one. I started out with and 8" wide strip but ended up going down to 6" so it wouldn't lie straight out. I probably should have interlined or stuffed the puff to get it to behave better.


I used a 54" long strip and gathered it to the sleeve. After playing around with it a bit, I sewed the bottom edge down 1.5" from the top of the sleeve and the top edge .5" away from the top. I finished the raw edge with a strip of straight grain fabric. Bias might have behaved better but I didn't want to make any and bias + stripes makes some crazy looking bias tape.


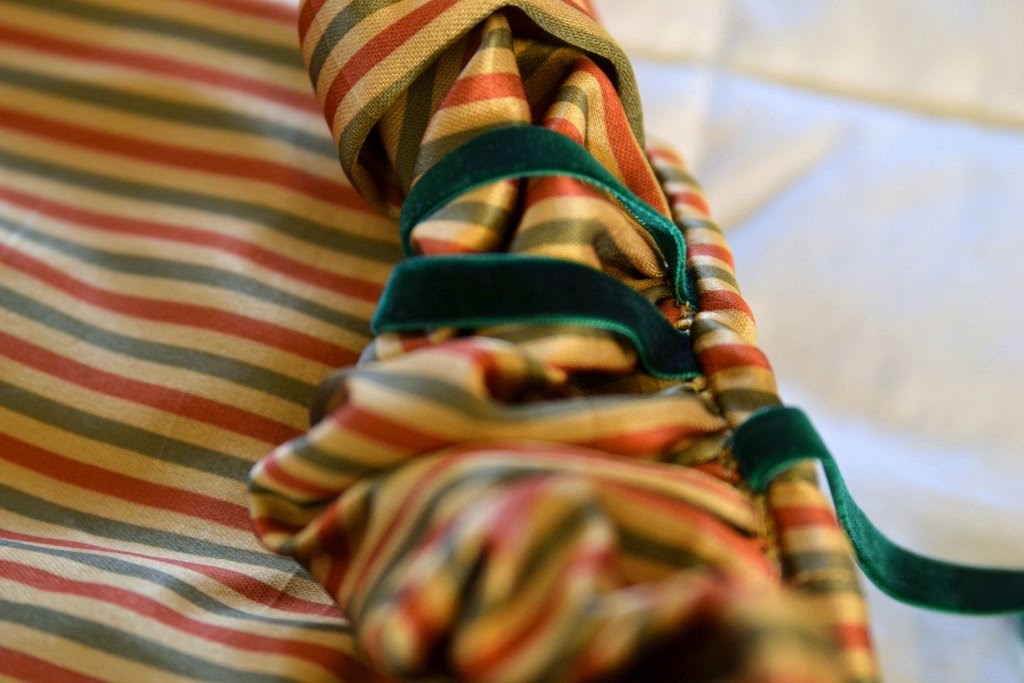
While making the puff, I added 4 strips of ribbon to help it behave.


 Each sleeve ties to the bodice with 3 ties. Just make sure that you have someone to help you dress who can tie bows. Otherwise, you'll be running around before faire trying to find someone to tie your bows since your husband apparently never learned how.....


I also whipped up a new partlet since I wanted one without a ruff. It's made from cotton voile that I had lying around from my wedding dress. I used my same ruff pattern (forget where I got it from) but made it straight front instead of slanted to meet in the middle. I started out hand sewing it, but got bored and finished the rest by machine. I decided to use bias tape to finish the bottom and make ties all in one go. By this time I was in a rush to get everything finished and I was not about to make tiny ties and turn them by hand.

Monday, October 20, 2014

When Bloggers Meet Up

There's something wonderful about meeting someone in real life that you've already gotten to know online. It's like being instant friends! And last weekend, I got to meet up with Kate of Adventures of a Fashionista Geek and some of her friends for a fun day at the Ohio Renaissance Festival.


She wore a lovely ivory and purple dress she made herself!


 It was rather chilly in the morning and she came prepared with a great faux fur wrap.

 Kate also made all of her friends costumes! Don't they all look sharp!


 I had such a great time hanging out with them all day! It was a blast!


Photography by Will Thorpe

Saturday, October 18, 2014

La Vita Italiana

I finally finished my Italian dress! Woot! This was the dress that really didn't want to get made but I finally did it.


The story of this dress is rather a long one. I bought the fabric way back in 2012 to make a dress to wear to the Kentucky Renaissance Festival. Of course, after I got home and thought about it, I decided that polyester was a bad choice for a summer faire. So I scrapped that idea and the fabric was added to the stash.


After making a few kirtles, I knew I could squeeze a dress out of the 4.5 yds that I had in my stash, if I could find some evidence for stripes from this period. So I searched high and low and finally came up with some inspiration.


So 16th century Italian it was! Luckily, the shape of this dress was very similar to English styles of this period so I could use my kirtle pattern as a base. I decided to go with a side back lacking to minimize any interruption to the trim. (And there was a lot of trim!)


The sleeves were a big hurdle since I'd never made sleeves like this before. I started with my self drafted sleeve base and then experimented until I got a poof that I liked. It took a few tries but I'm pretty happy with the final version.


On the actual day of wearing, I had some issues with the lacing so it did some loose but there's always a few hiccups the first time you wear an outfit out to an event.


I also got to wear the jewelry I bought last year. I think the set definitely has a more Italian feel than an English feel. And I also whipped up a new partlet for this outfit since Italians weren't into the ruffs and ruffles the way the English were. And one can never have too many partlets.


The hardest part of figuring out this ensemble was what to do with my hair! It is easy to pull off short hair with and English look since they were all about having your hair covered. Italians were more ok with showing off your hair. So I played around with my fake hair and came up with this look.


Overall, I'm quite happy with how this dress came out! And I definitely want to make some more Italian costumes. I've got a few more posts on this dress coming up including a construction post and some pictures of a blogger meet up from last weekend!

Thursday, October 16, 2014

Tarte Makeup Review

Today we're talking makeup!


Have you ever tried any Tarte cosmetics?

Tuesday, October 14, 2014

Preparing for a Florida Winter

With the big move fast approaching, I can't help but thinking about adapting my current wardrobe to a drastically different climate. So instead of giving into my desire to sew all the wool things, I'm trying to prepare myself for a Florida winter which I'm hoping is sort of like an Ohio fall. (Or rather what an Ohio fall would be like without the roller coaster temperatures but with a beach.) So here's a look at some of my favorite fall outfits that I'm hoping to rock this winter.


My late 40s corduroy and wool dress.


My favorite sweater and atomic circle skirt.


This great 1940s chartreuse dress.


My sassy 50s velvet suit.


My "On the Town" dress.

Do you have some favorite fall pieces that you're planning on transitioning into your winter wardrobe as well?

Saturday, October 11, 2014

The Borgia Dress Project

A while back, I posted about my dream to sew a dress based off of the costumes in the show The Borgias and it's going to happen! I spent a lot of time researching and looking for fabrics and such and I found some stuff out.

The first thing I needed to know was how period accurate were the costumes. They were gorgeous but costumes on film (especially on tv shows) have a tendency to be rather unperiod. And these are no exception.


Actually 1490s garments- note the curved bust, center front lacing and over gowns they are all wearing.


 The Borgias dress- straight front, side or back lacing, and no over gown. But they do get points for period appropriate prints, chemises and period appropriate hair.

So even though they are not 100% period, they are gorgeous and they aren't that far off from what would have actually been worn (especially when compared to some other "period" tv shows that have come out lately). And I love them so I'm going to make one. Plus I'm feeling in the mood for a pretty pretty dress.

Despite being set in France, the costumes in the movie Ever After are also based off of this period also and it's one of my favorite movies. So double score.


Originally, I was really inspired by this dress that Vanozza, the mom, wore. I really loved her outfits because they were higher cut and lower waisted than most of Lucrezia's more fashionable dresses. Being a chesty gal, I needed some space so I wouldn't be popping out everywhere.


But I ended up deciding on this dress, but in purple since I'd already fallen in love with some pretty purple fabric researching the other dress. And it will be silk because I want to sew the pretty things!


On the left, purple silk doupioni and on the right, black and gold silk damask. Most of the gown will be the doupioni and the contrast trim will be the damask. I also snagged a gorgeous dark purple silk blend velvet for the bodice.

Of course, the first step in a new period is period appropriate under garments so it'll be a while before I can start working with the silk. (So I'll just pet it for now....) The corset is mostly done and the chemise is up next on my list. Thankfully, I can do a pretty period accurate shift for this dress so I can use it for other more historically accurate dresses.