
Oh, my Elizabethan court dress..... It started out as a Tudor dress (right) back in 2011 when I'd only been sewing for about a year. The construction was fine (although it took forever) but the fit was not so great especially since my corset was too big. The right is the Elizabthan-ified version of 2012 after I'd lost 30lbs, made interchangeable sleeves and got a new corset. But it still really didn't fit well. I only wore it once last year to a ball and I knew that it needed some serious work before it could be worn again.
I decided to completely scrap the bodice and use my gray wool kirtle as the supportive undergarment rather than the second corset.

Tada! New bodice!
The Challenge: #1 Make Do and Mend
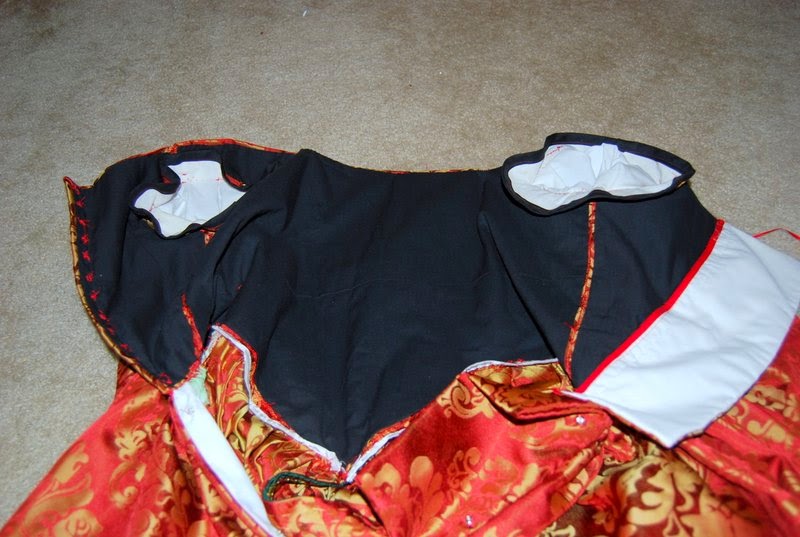
I had to piece a lot of the lining but waste not!
Fabric: Leftover fabric from making the dress the first time, cotton scraps from another project for lining and leftover cotton twill for interlining

Pattern: I drafted it from a combination of the original bodice pattern (Simplicity 2589) and my gray kirtle pattern.

Year: Tudor/Elizabethan (ie second half of the 16th century) depending on what sleeves and headgear I use
Notions: red thread from stash, plus I reused the bones from the original bodice
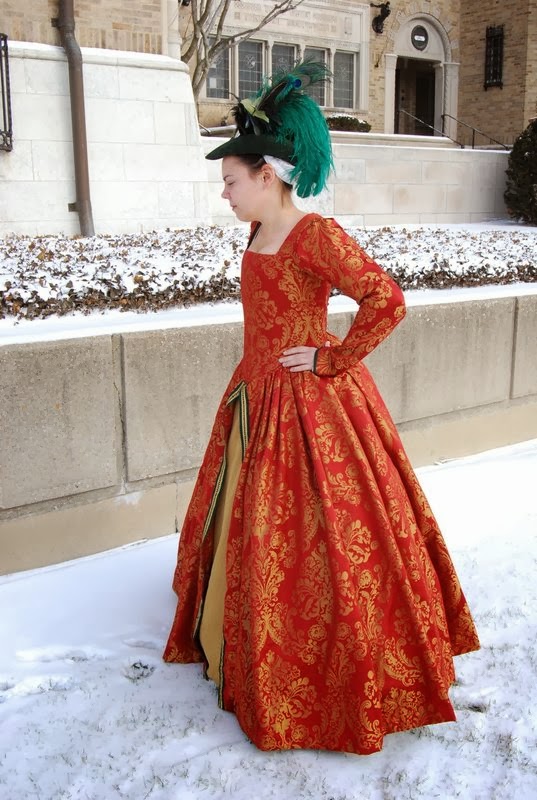
How historically accurate is it? Well, the outer fabric is polyester and the lining and support layer are cotton so not so good on the fabric. Red and gold were popular colors during the period so that's good. The shape is much better with the new underpinnings and newly drafted bodice.

Love the new shape on this dress!
There's still a bit of curve near the bust, but that's perfectly period.
I also did much more period construction on the new bodice. I made it the same way I made the kirtle bodice. The biggest thing I wanted to improve (after the fit) was to do hand eyelets instead of using huge ugly grommets. So much nicer looking now!

I did dig out the old modesty panel from the original bodice and added it in after the photo shoot. And I'm going to have my husband practice his lacing skills before faire season. It does, in fact, lace all the way closed except for right above the waist seam.

No more gaposis!
My original idea for interchangeable sleeves were to attach lacing rings to the armscye and the sleeve head and tie them together. It was a major fail! They were super fiddly and the sleeve facing kept poking out. This go around I decided to lightly whip the sleeves in. It's a bit more work when it's time to interchange them but they function much better when in.

You can see the whip stitches but I'll follow the old costumer's adage-If they're looking that close, kick them!
The original skirt I kept the same except adjusted the pleats to fit the smaller bodice waist. It was partially hand sewn and partial machine sewn to the original bodice and I hand sewed the entire thing to the new bodice. The rest of it is the original machine stitching from when I first made the gown.

Hours to complete: I lost count. It was a lot of hand stitching but it went a lot speedier than my first go at a mostly hand stitched piece.

First worn: January 2014 just for pictures
Total cost: $0 everything was leftovers from other projects.


Not to mention, I was never very happy with the particular shade of gold I used when trimming this gown. It reads a bit tacky halloween costume.
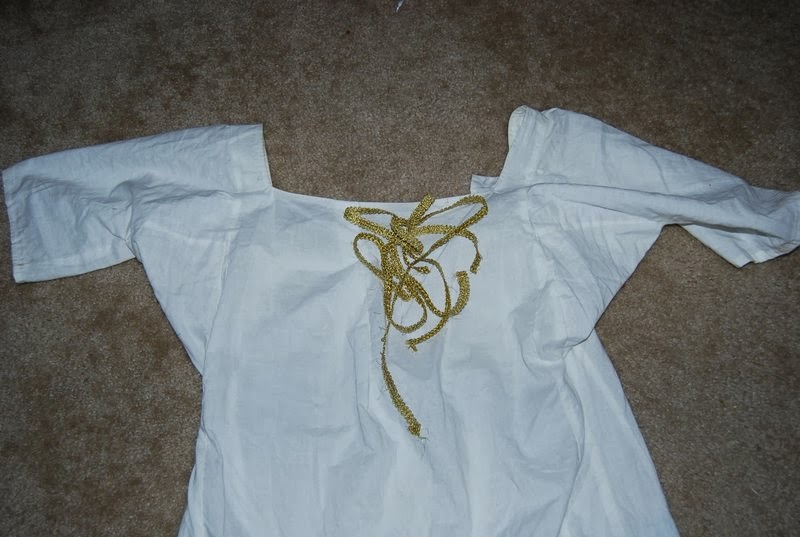
Speaking of trim, as part of the make do challenge, I also removed all of the scratchy gold trim off one of my shifts. You couldn't see it anyways.

I'm thinking something gold that more matches the gold in the dress fabric plus pearls! I loved beading my 19-teens does Elizabethan fancy dress.

You may have noticed an Eizabethan explosion on my pinterest this week. I may or may not have spend most of my free time this week "researching".

Yay for having the hard part of this dress done and just the fun part left!
Wow! I have always been blown away by your spectacular costuming work. This dress is incredible!!! I say pour on the gold and pearls!
ReplyDeleteI love this dress you look so grand in it! What a wonderful fit and wonderful use of fabrics. I also very much love your hat. You look like you are ready to attend court:) I love how you are able to change a few things and give it a completely different look.
ReplyDeleteI adore this dress. The color scheme is wonderful and it looks so good on you! Plus that hat? Fabulous.
ReplyDeleteI actually think this third version so far is my favorite. I'm not always fond of the tudor style, but the second was nice and I like the pretty simplicity of the third version. Th fabric is stunning.
ReplyDeleteWow, what an improvement, looks marvelous!
ReplyDeleteWhat an amazing improvement! Your construction is outstanding! And that hat is phenomenal!
ReplyDeletexoxo
-Janey
Is so gorgeous! Wonderful construction job. I feel like one of the great Renaissance artists should paint you wearing this stunning, newly revamped dress.
ReplyDelete♥ Jessica
Beautiful dress ! The fabric is to die for and the fit is perfect !
ReplyDelete